 |
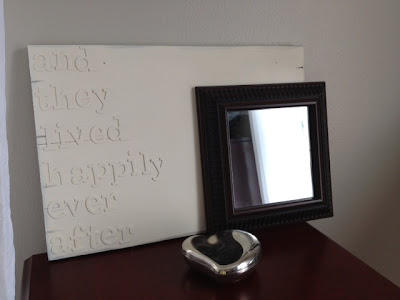
| Wood sign paired with mirror my husband used to propose...aww |
What I do have is some
 The other day, though, I was at Goodwill and came across this gem. It doesn't look like much but it had a $3 price tag and at 1.5' by 1' I thought it would be perfect for my sign.
I then decided to use DIYThickers instead of wood letters -- which are far easier to find at craft stores anyway. They're basically foam stickers so they give some dimension rather than a flat sticker. This was my first go at Thickers and I was pretty happy with the result. The only thing I think I'd change is next time I wouldn't get such a "cutesy" font for a project like this. Anyway, not only were the DIYThickers way cheaper than wood letters, since they're stickers the glue gun was taken out of the equation. I bought two packs for a total of $5.50 just to be sure I didn't run out of any letters.
First, I spray painted the entire sign to a nice even heirloom white. Once it was dry, I used my laser level to provide a straight line on my board so I could easily stick the letters in a straight line. I started with one saying only to realize it was way to long for my size board...so I ended up taking all the letters off and starting over. I was able to reuse the same thickers so they weren't wasted.
Once they were all on there -- I made sure no edges were sticking up -- I spray painted the entire sign again to coat the letters too. When that was dry I did one more coat just...well, basically because I have a slight obsession with spray paint. (By the way while I was spray painting, I took at this $1 candlestick, too. I picked up three a few months ago at the thrift store and this was still waiting for some love. Can you believe someone would actually throw this away knowing it could look like this...gasp!)
 |
| Click here for the tutorial on the DIY rope pillar candle |
For now I have it in my work-in-progress master bedroom...but I'm not sure I'm going to keep it there. Perhaps it will find a home on the mantle.


I'm about to do this for my step-daughter's wedding. Doing the lyrics of her first dance. I got cold feet and nervous that it wouldn't look right - and decided to google "thickers" and found this blog. Thank you, based on your sign, I think it will work!
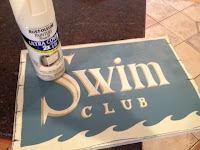
ReplyDeleteJulia - I loved the way it came out. I also made another one for my son's room and I ended up taking the thickers off after it was painted so the wood was exposed (paint first if you want your letters a certain color) That would work too if you're worried about not getting straight lines by doing it freehand, but don't necessarily want the depth of thickers. Here's a link to that project if you're interested in seeing that option. http://twoityourself.blogspot.com/2013/05/diy-wood-sign-with-picture-frame.html
ReplyDeleteThanks for stopping by!